.jpg)
How to Make Pottery –
8 Step Pottery Making Process
I’ve been making pottery for years now and I love it. It’s a great way to relax, get creative, and even make some money! Did you know that making pottery from start to finish can take several weeks or more? It is not hard but it does take time and patience. With each project being different, not only is it fun but there’s always something new that can be learned along the way too so it never gets boring!

8 Step Pottery Making Process
There are several ways to shape and decorate your clay. We will go step by step through everything it takes to make a pot, starting with clay until the piece is complete, and learn more about what goes into creating your favorite mug or bowl. Let’s get started!
Step #1: Choose your Clay
Choosing the right clay is an important decision. There are many different clays, but there are three main types that most potters choose from, each with its own benefits and firing temperatures.
Step #2: Wedging the Clay
Wedging your clay is an important step you shouldn’t skip for several reasons. Most importantly it eliminates any air bubbles that may be in the clay. Getting rid of the bubbles will make the clay easier to work with.
Step #3: Choose a Pottery making Technique
After you have decided on the Clay and how to Wedge it, now it’s time to make your pot. There are several different ways to mold clay. These are the three main techniques that beginner potters usually choose from.
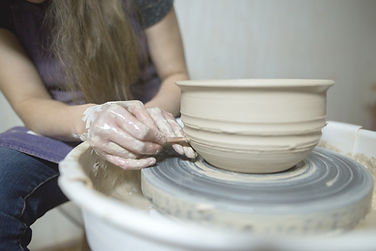
Step #4: Making the Pottery
After choosing one of the techniques you can start crafting your work of art. When making your pot if you mess up as most beginners do just grab another piece and start over. Remember there are no mistakes, you can Recycle your Clay many times.
That’s the fun part of pottery making if you do make a mistake and don’t like what you’re making you can just start over.
Step #5: Trimming and Decorating your Pottery
After you finish making your piece you have some options. You can Decorate it with Underglazes and slips in the greenware state (wet, leather hard, or bone dry). It’s important to know what you can do in the Different Stages of Clay.
Step #6: Bisque fire the clay
Once your clay is Bone Dry you can Load the Kiln for a bisque firing (Video) The main reason behind pottery cracking or even exploding in the kiln is because your piece was not left out to dry long enough. While it may appear dry, moisture is still in the clay.
Step #7: Glazing your pottery
Once the clay is bisque and turns into ceramic material it’s time to apply the glaze or glazes, or underglazes to your bisque pottery. There are so many ways you can apply the glaze. The main ways you can apply your glaze are Dipping, Spraying, Brushing, and Pouring. For more ideas on glazing check out How to Glaze Pottery – 9 Pottery Glazing Techniques
Step #8 Put your Pottery in the kiln for a glaze fire
After you have let the glazed pottery dry, Load it in the Kiln for the final fire (Video) Temperatures in the pottery kiln range from 1828 degrees Fahrenheit (998 C) to 2345 degrees Fahrenheit (1285 C).